Picking Angles
The angle at which the pick strikes the string is also an important factor. While everyone will have there own personal preferences as to which angles they use for a particular scale run, arpeggio sweep, or lick. generally speaking the following will be a great starting point for alternate picking.
In the picture below you see three basic picking angles. Right, Flat, Left. The “right” angle is generally where you will want to have your pick angled for most playing. This puts the front edge (also called the leading edge) of the pick in contact with the strings when performing a down stroke, and it puts the back edge of the pick in contact with the strings when performing an up stroke.
Picking with a flat angle is possible but not advisable. Doing so you will encounter more resistance when striking the string. The reason for this is that you are striking the string with more material and a flat surface. This will make it feel like you need to use more effort to perform a down stroke or an upstroke.
The left picking angle in the picture above is the same as the right, just reversed. For some people this is more comfortable, though it is certainly not as common as using the right angle.
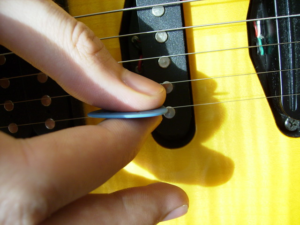
Below is an example of a flat picking angle.
Here is an example of “right” or “leading edge” picking angle.
Here is an example of varying degrees of angle while using the leading edge of the pick. From right to left the angle gets more extreme. Usually something in the middle works the best. You don’t want to go too extreme or your tone will suffer and sound thin.
Something to also mention is “pick slanting”. Pick slanting is when you angle the top of the pick (the part that resides between your thumb and finger) either down or up. This technique also aids in less resistance, but most importantly it aids in angling the pick to where it can break free of the plane of strings, and allow you to switch strings more efficiently when alternate picking.
Below is an example of downward pick slanting. You’ll notice that the top of the pick (not the tip) is slightly below the string that is being picked.
Here is an example of some pretty extreme downward pick slanting. This is Eddie Van Halen using downward pick slanting while tremolo picking.


